
The Avocado Army
I loved the way it came together. These guys might have to battle in the Great Guacamole War.
The Avocado Army-

wanted to incorporate a waving flag.
For this animation test, I drew inspiration from articles and information I have read in the past few years regarding the avocado industry in Mexico. This major export of Mexico, although it has done some great things for the country, it is plagued with significant issues, from deforestation, water consumption, and poor working conditions to government corruption and cartels. I've always been interested in working with avocados; my goal was to animate multiple subjects in synchronization, supporting and practicing for a larger project.
I loved the way it came together. These guys might have to battle in the Great Guacamole War. Visit my Instagram (@nimra) to watch them march to “La Marcha De Zacatecas.”
Thanks for visiting!
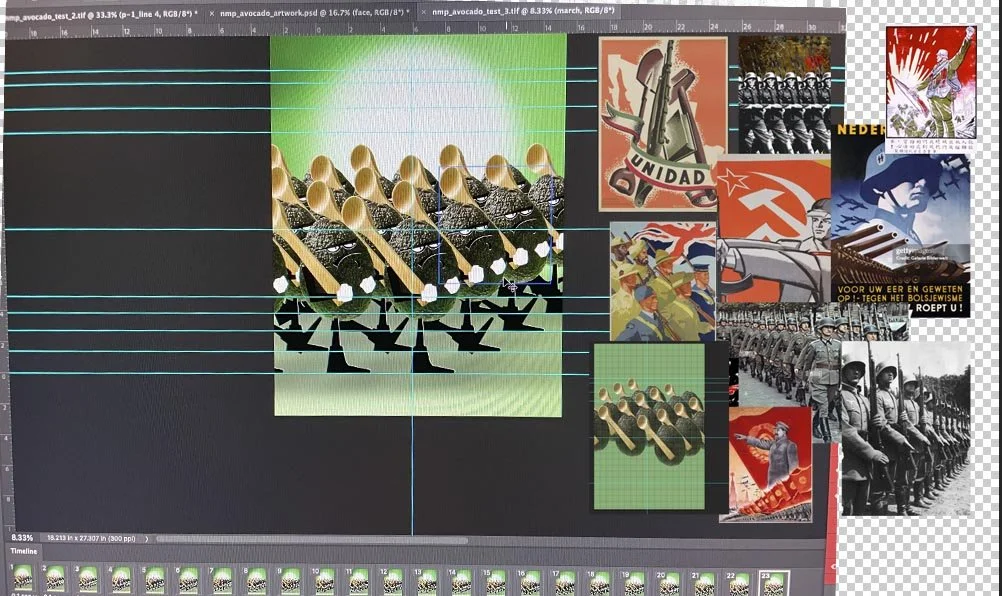
It made me think of the old WWII and Communist propaganda.
Breakdown:
Props-
Two Avocados $2.00
Wooden spoon was an add-on I found at the studio.
Background Savage Mint Green 5’ Client left it for me.
Lighting:
1 Broncolor 800L with large softbox
1 Broncolor 400L small soft box as my key

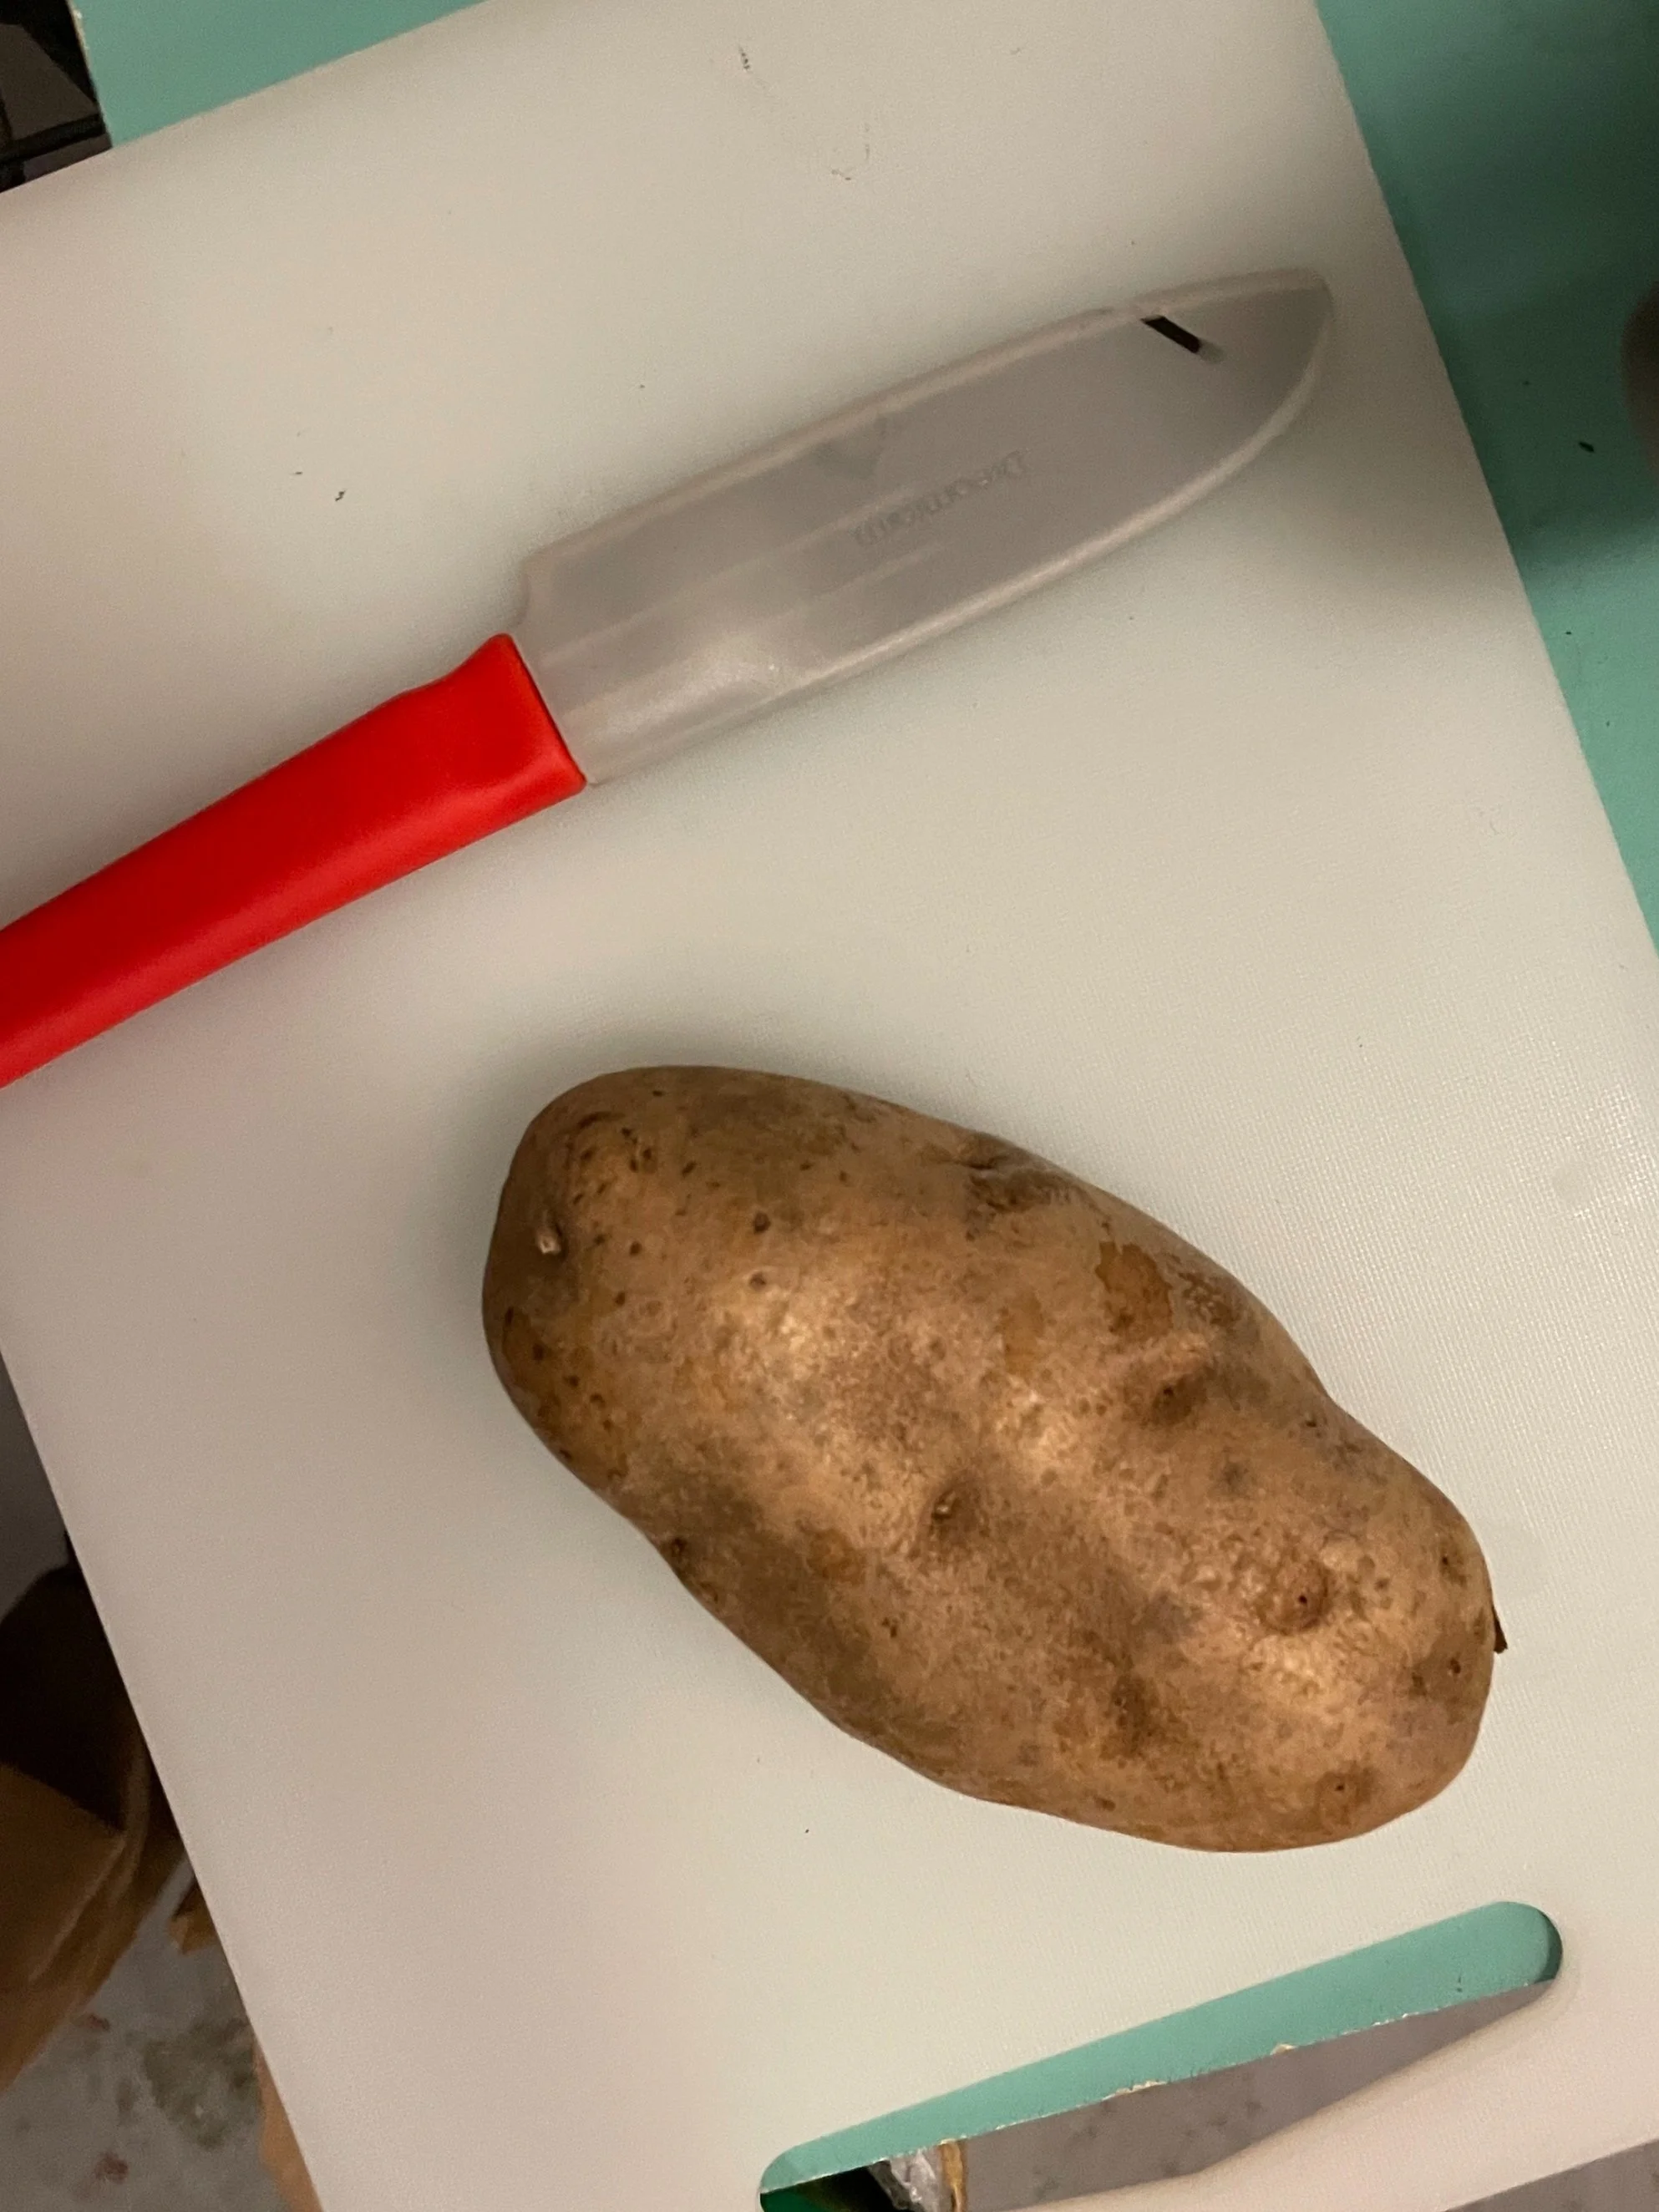
What are you lookin’ at!?
I am a fan of classic Mickey Mouse cartoons and the simplicity (not at all simple) of the movement and character design.
This is a test. Nicholas Mira Photo is conducting an animation test for a future project. This is only a test.
My goal here was to test some simple animation techniques and to concentrate on multiple functions within the animation. Plus, make something fun to look at. If you visit my IG (@nmira), I accompanied his movement with Louis Armstrong’s “Potato Head Blues.” Again, paying homage to the golden age of cartoons. I will conduct a few of these animation tests using different foods before I dive into my next project, which will require more animation. I like the clean background, so I’ll stick with that style for future tests.
I wanted the potato character on a pink, spotlit backdrop, and to animate multiple eyes, with him bouncing up and down a bit. Overall, it worked well, and he’s a great little character that I hope to bring back.
Breakdown:
Prop-
1 hand selected potato .67 cents
Pink Savage seamless “Coral” is the name, $35.00 (purchased for a shoot a few years ago; I don’t think the client even used it.)
Lighting:
1 Broncolor 400 L standard L40 reflector shot through a 4’x4’ diffusion frame.
1 Broncolor 800 L p65 reflector with a 20-degree reflector
I drew the elements in Procreate and animated them in Photoshop.

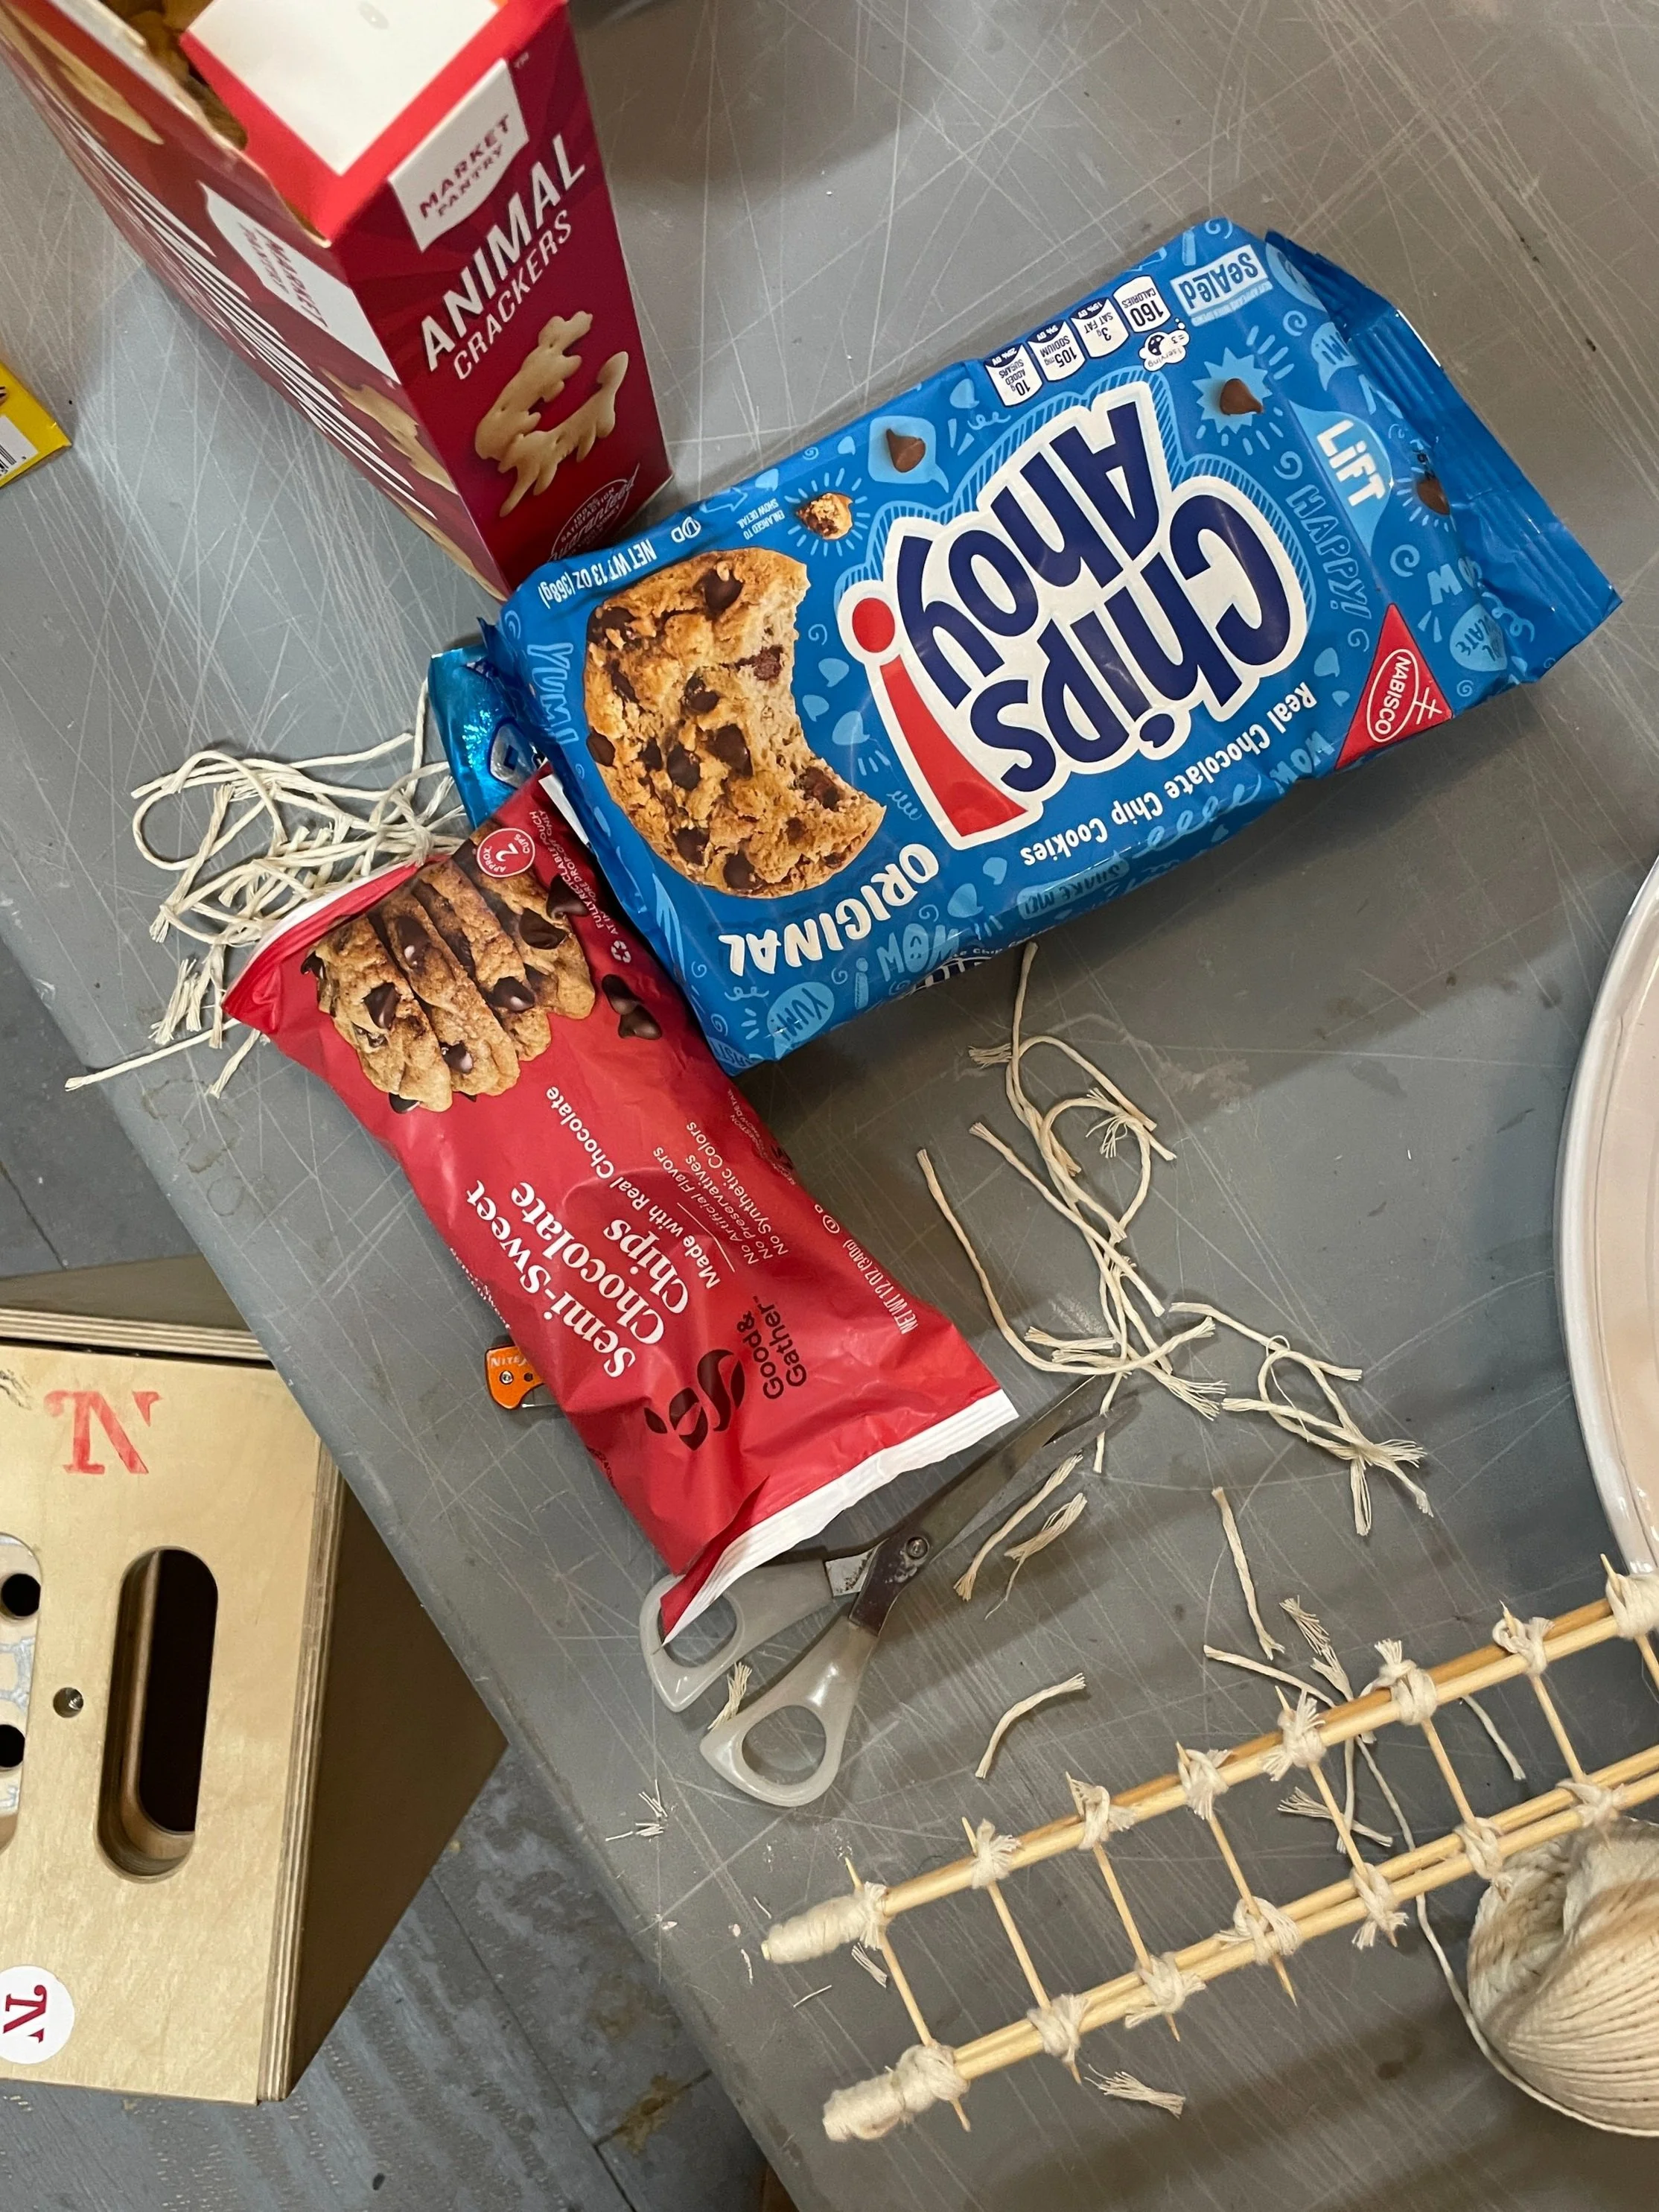
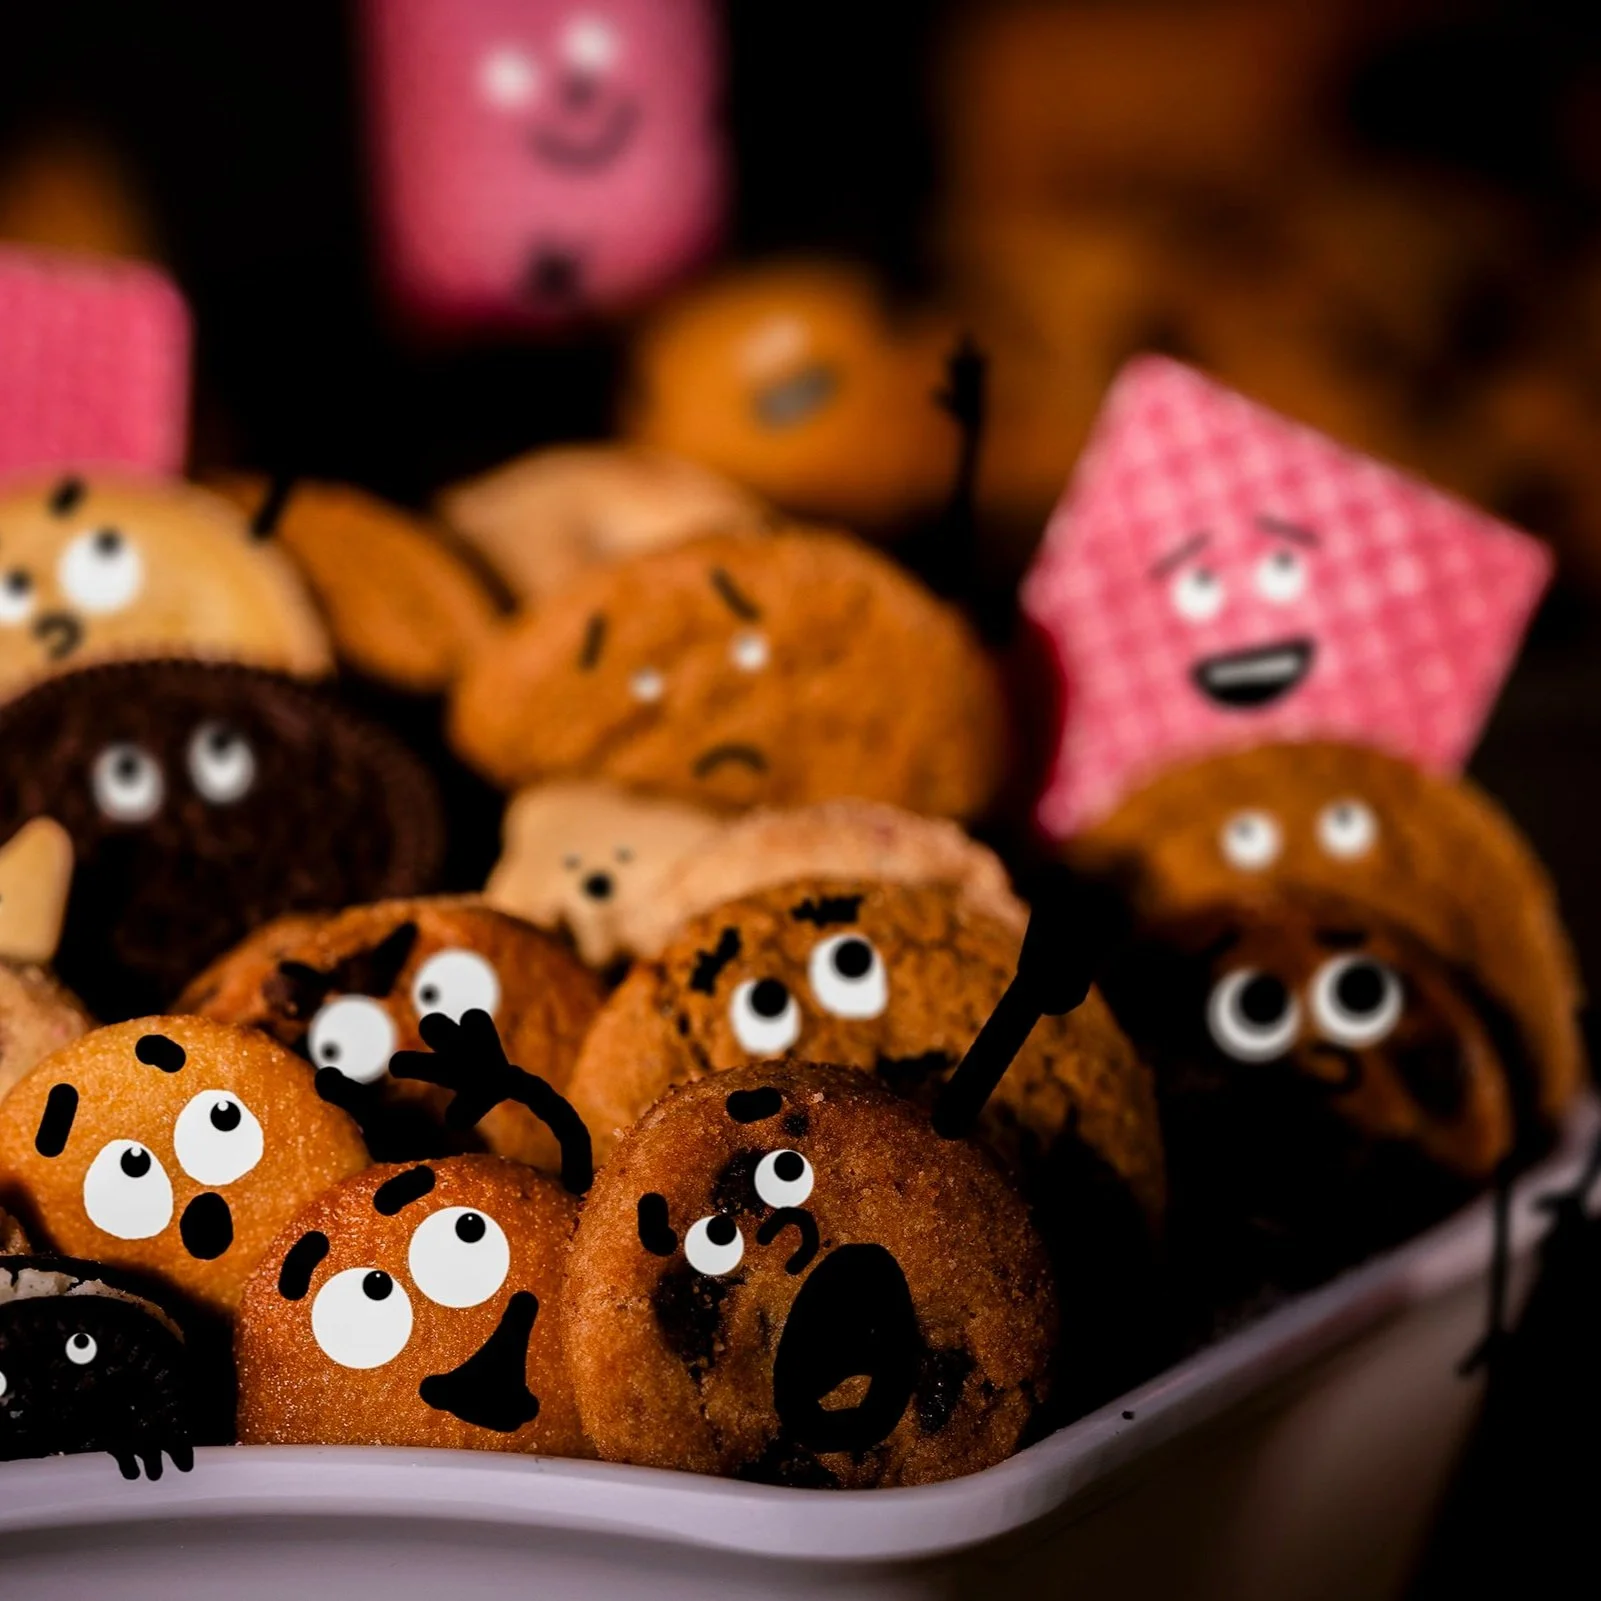
Cookie Circus 2025
Some sketches I did about a month before I started this piece, along with some BTS images. I am trying to build my portfolio of work and get these ideas out of my head.

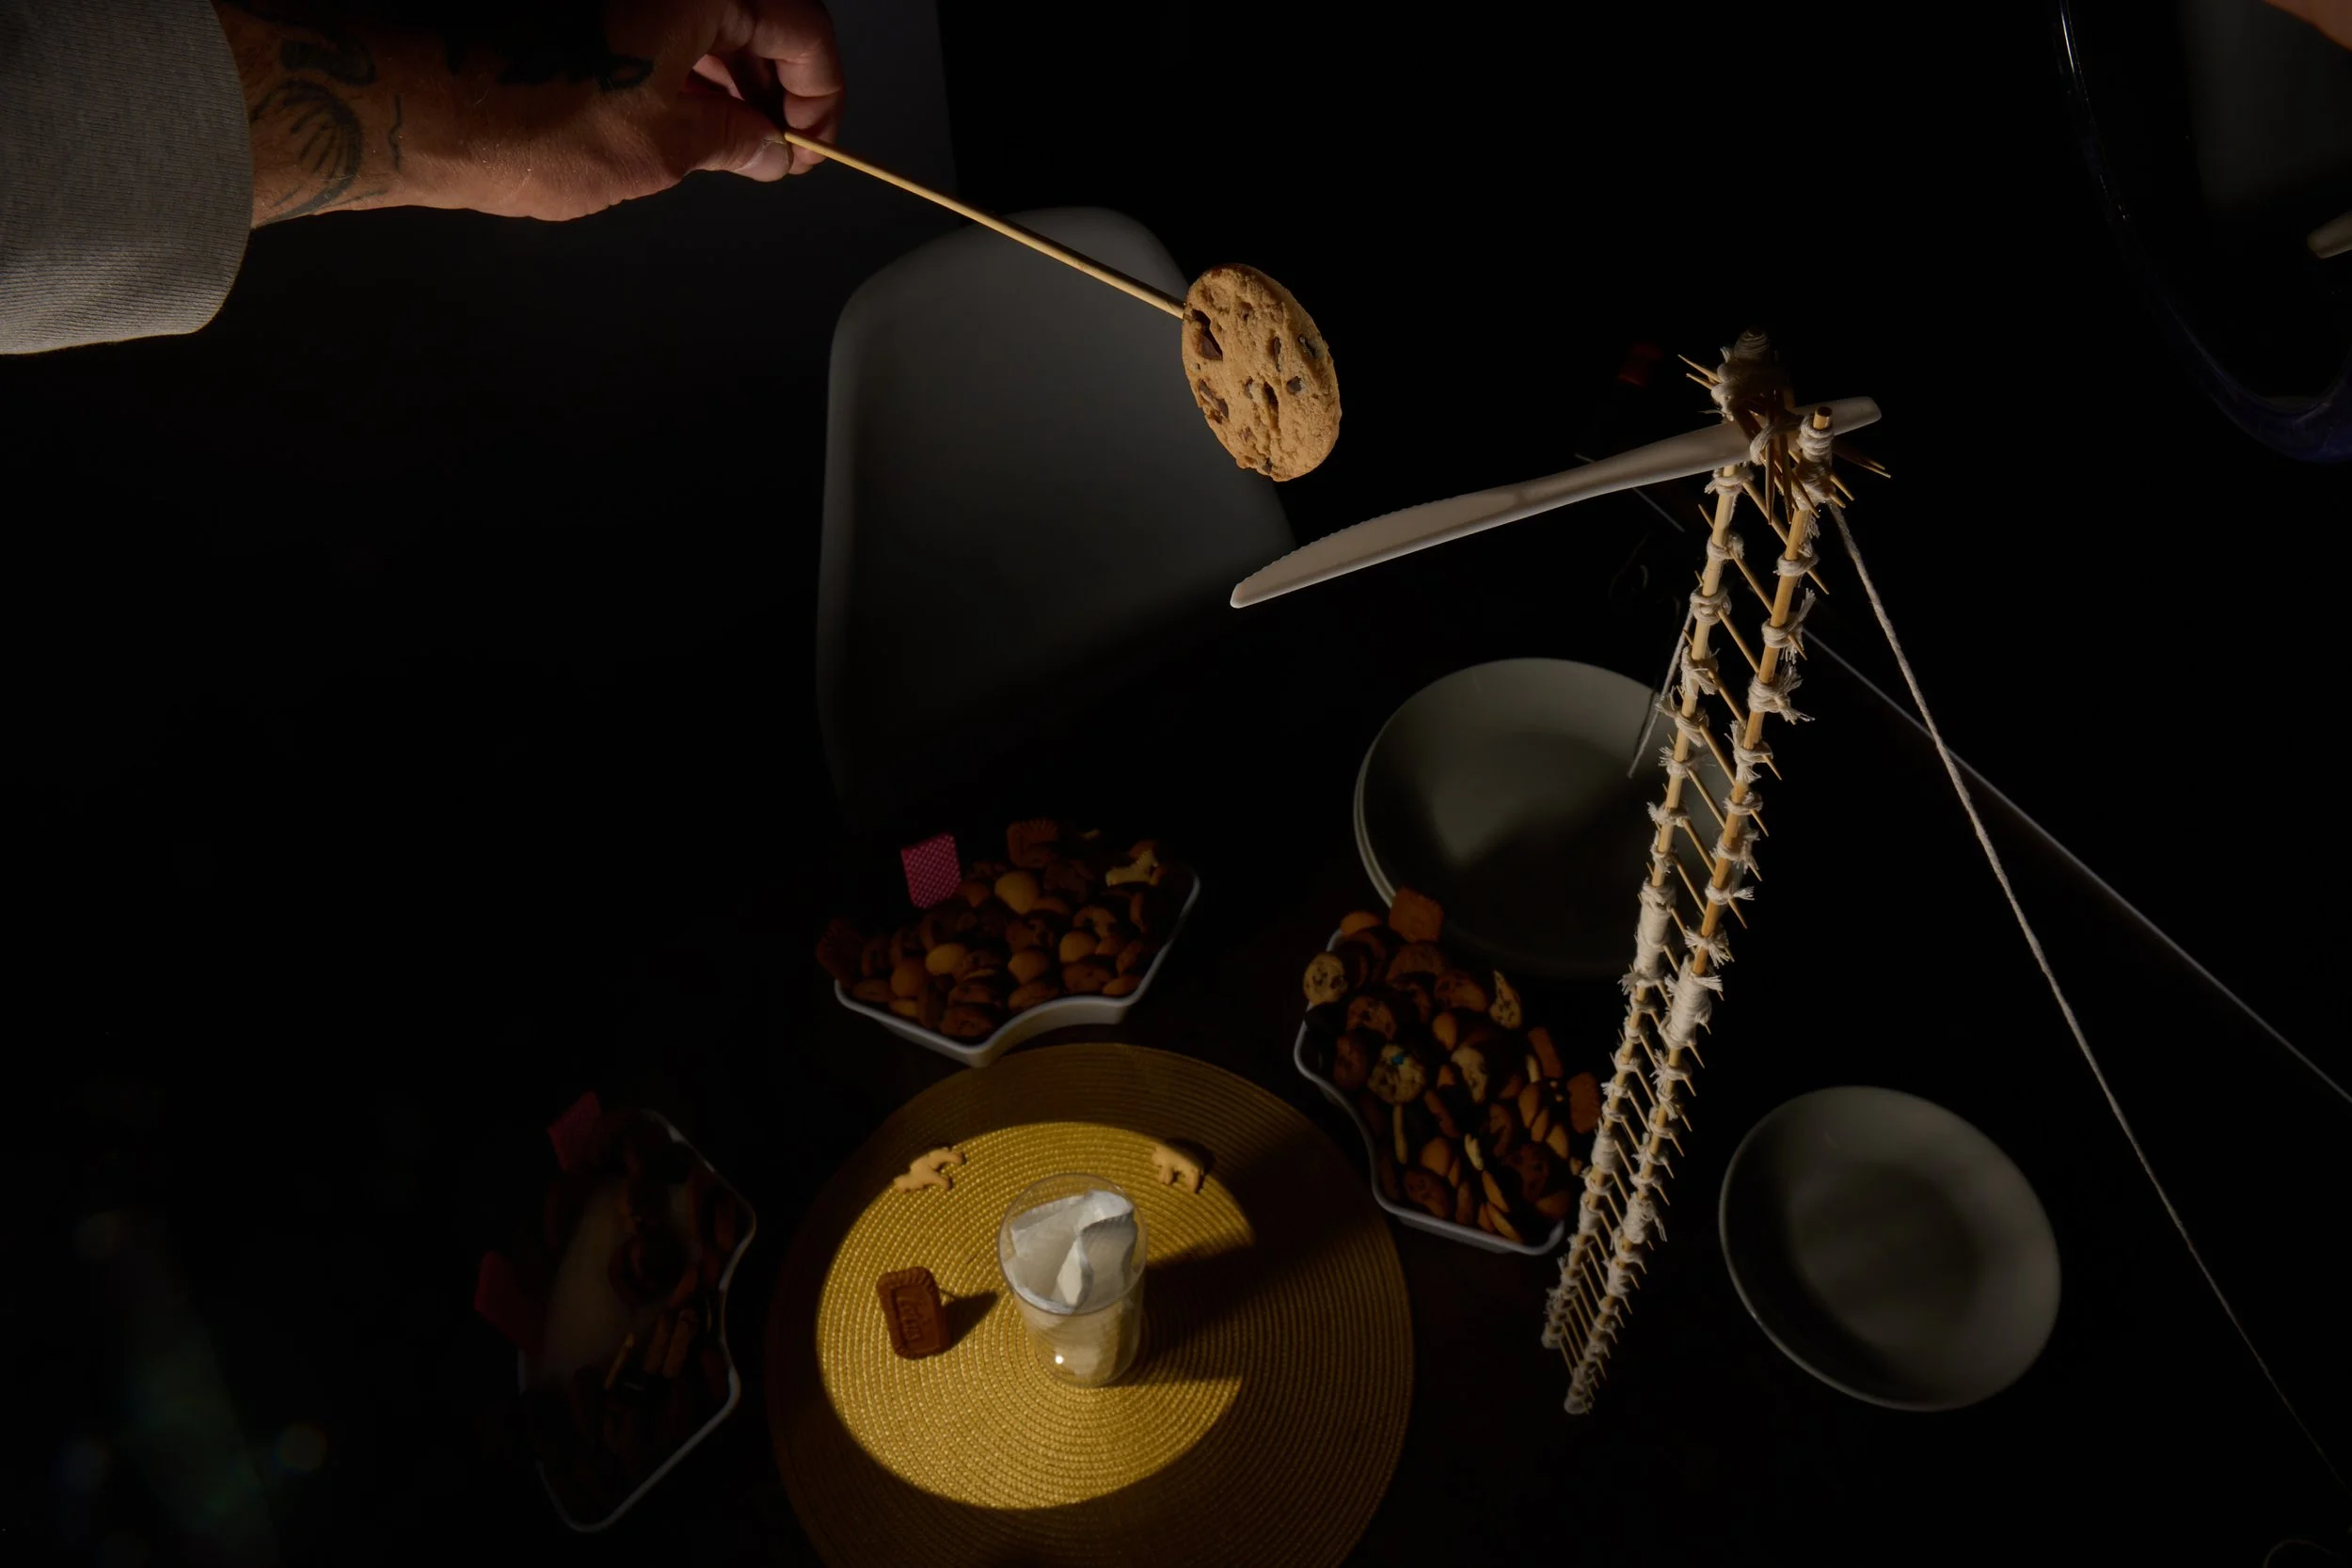
My original idea was just the cookie on the edge of the spoon made to look like a diving board, ready to jump into the glass of milk. I didn’t think I’d have it in a circus setting. Then I started to think about how engaging and fun a circus could be. Plus, lighting a circus scene would be AWESOME. I started to consider what the cookie could be doing; should it be a highwire or trapeze act??? This could go many different ways, but then I thought—no, the classic cartoon high-dive into a thimble of water, right? As I started researching this, I knew I wanted the ladder to look uncomfortably high. Wide-angle focal length (35 mm) pulls that distance, a vertigo feeling. Then the layering started to take shape; if I were to have a giant ladder (made of skewers and toothpicks wrapped with cooking twine), then we needed an epic scene below. Ringmasters are always great characters; I went with the Biscoff because I felt the Belgian character would be a nice touch, and I wanted a cool mustache. I used a variety of cookies for the other performers and the audience, and I got mini versions to make the scene look even higher and more crowded. Opening the Oreo and revealing the frosting was perfect for a clown face.
These pieces, and everything I try to do in photography, start with a good lighting scheme. I intended to create a classic circus at your dining room table. I wanted it dark and moody, with only spotlights, allowing the “performers” to be the focal point and carry the viewer in each scene.
Overall, I am happy with the way it turned out. Considering a series of images rather than just one image to tell the story was a great challenge. Funny enough, I came up with the failed attempt when I realized that Chips Ahoy cookies are smaller than I anticipated. I was going to have him stuck in the glass head first, drowning, but this worked better and was more comically tragic.
Thanks for checking it out.
Til next time!
Nick
BREAKDOWN:
Props:
Mini Wafers- $4.79
Chip Ahoy- $3.89
Biscoff- $3.19
Animal Crackers- $1.69
Mini Oreos- $1.25
Duplex Cookies- $1.25
Keebler mini M&M- $1.25
ginger snaps- $1.25
Milk- $4.99
OJ- $3.99
Bananas- $1.87
Orange- .58
Apple- .88
Jello Cups- $1.49 x 2 $2.98
Pint glass- $1.25
Total prop cost-$33.85
Returned items:
Platter
Place matte
An alt tumbler glass I didn’t use
Items I had at the studio:
Plates, cups, and a teapot
Toothpicks, wood skewers, hot glue gun, tape etc…
Lighting: (I did try my Arri’s, but I didn’t have enough of them, and I knew I’d be hand-holding some of the cookies on sticks, so I needed the shutter speed)
2 Broncolor 400s with a snoot and grid set
1 Broncolor 800s with a Westcott Optical spot
3 dental mirrors on arms
2 small makeup mirrors, handheld
1 shinny board bounce on yoke.
No gels this time, looking back, I should’ve experimented.
Pre-light for my sketch phase
Lenses:
Most of these were shot with my 24—to 70 mm, varying f-stops depending on my intentions. The good range is from f/2.8 to f/11.
I was inspired by images from the 20s and 30s, and I wanted that cinematic feel. I used my 100 mm macro for the audience, f/3.5.

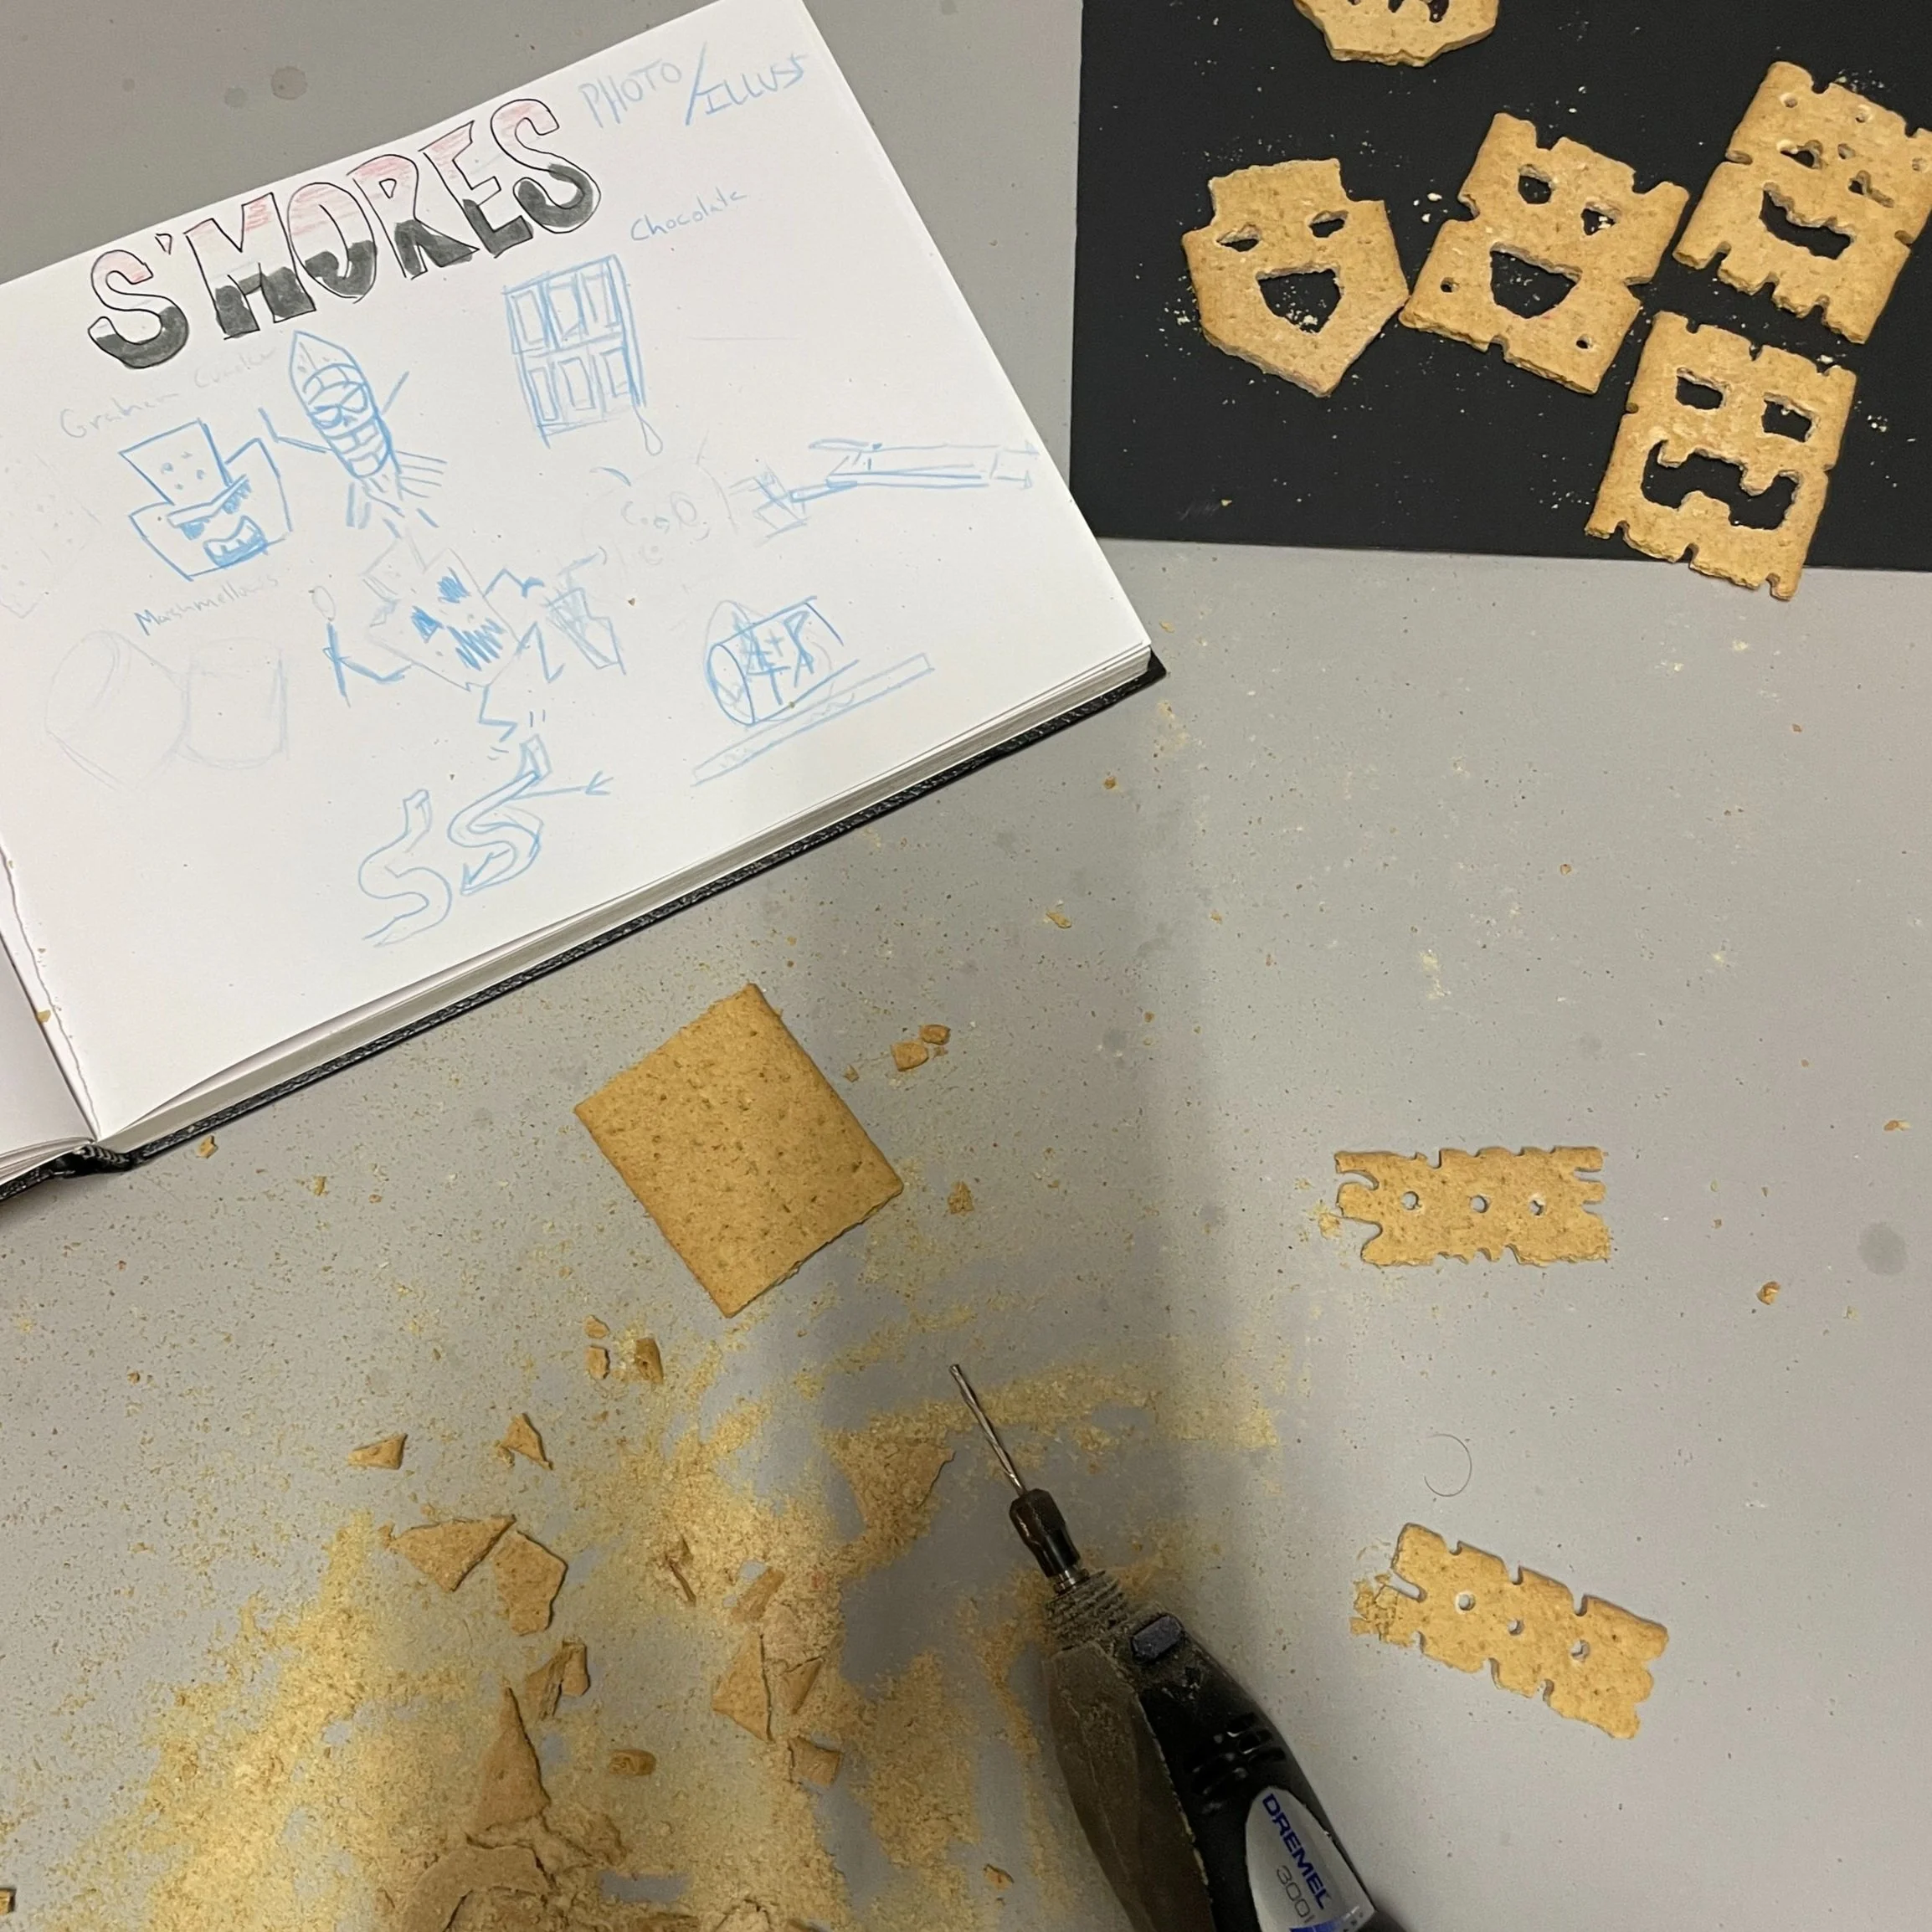
The S’mores Sacrifice
I took insperation from the Pacific Northwest and Polynesian culture for the look and feel of the characters and scenes. (We also just got back from Hawaii.) I used the plastic graham cracker wrapping as the grass skirts.

Nostalgia is the sound of a crackling fire and the feel of a cool summer breeze as you warm yourself. You enjoy a smile while holding the perfect roasting stick you found during a late-night kindling hunt. As you rotate the marshmallow over the flames, you become entranced by the thought of that delicious first bite. Pay attention; you'll burn—too late!
I have had this idea for some time, and knew there would be some logistics to solve. When I sketched this out, I wanted to focus on lighting, especially the idea of a campfire in the distance and the feel of a campsite. I knew the characters had to be comically terrifying.
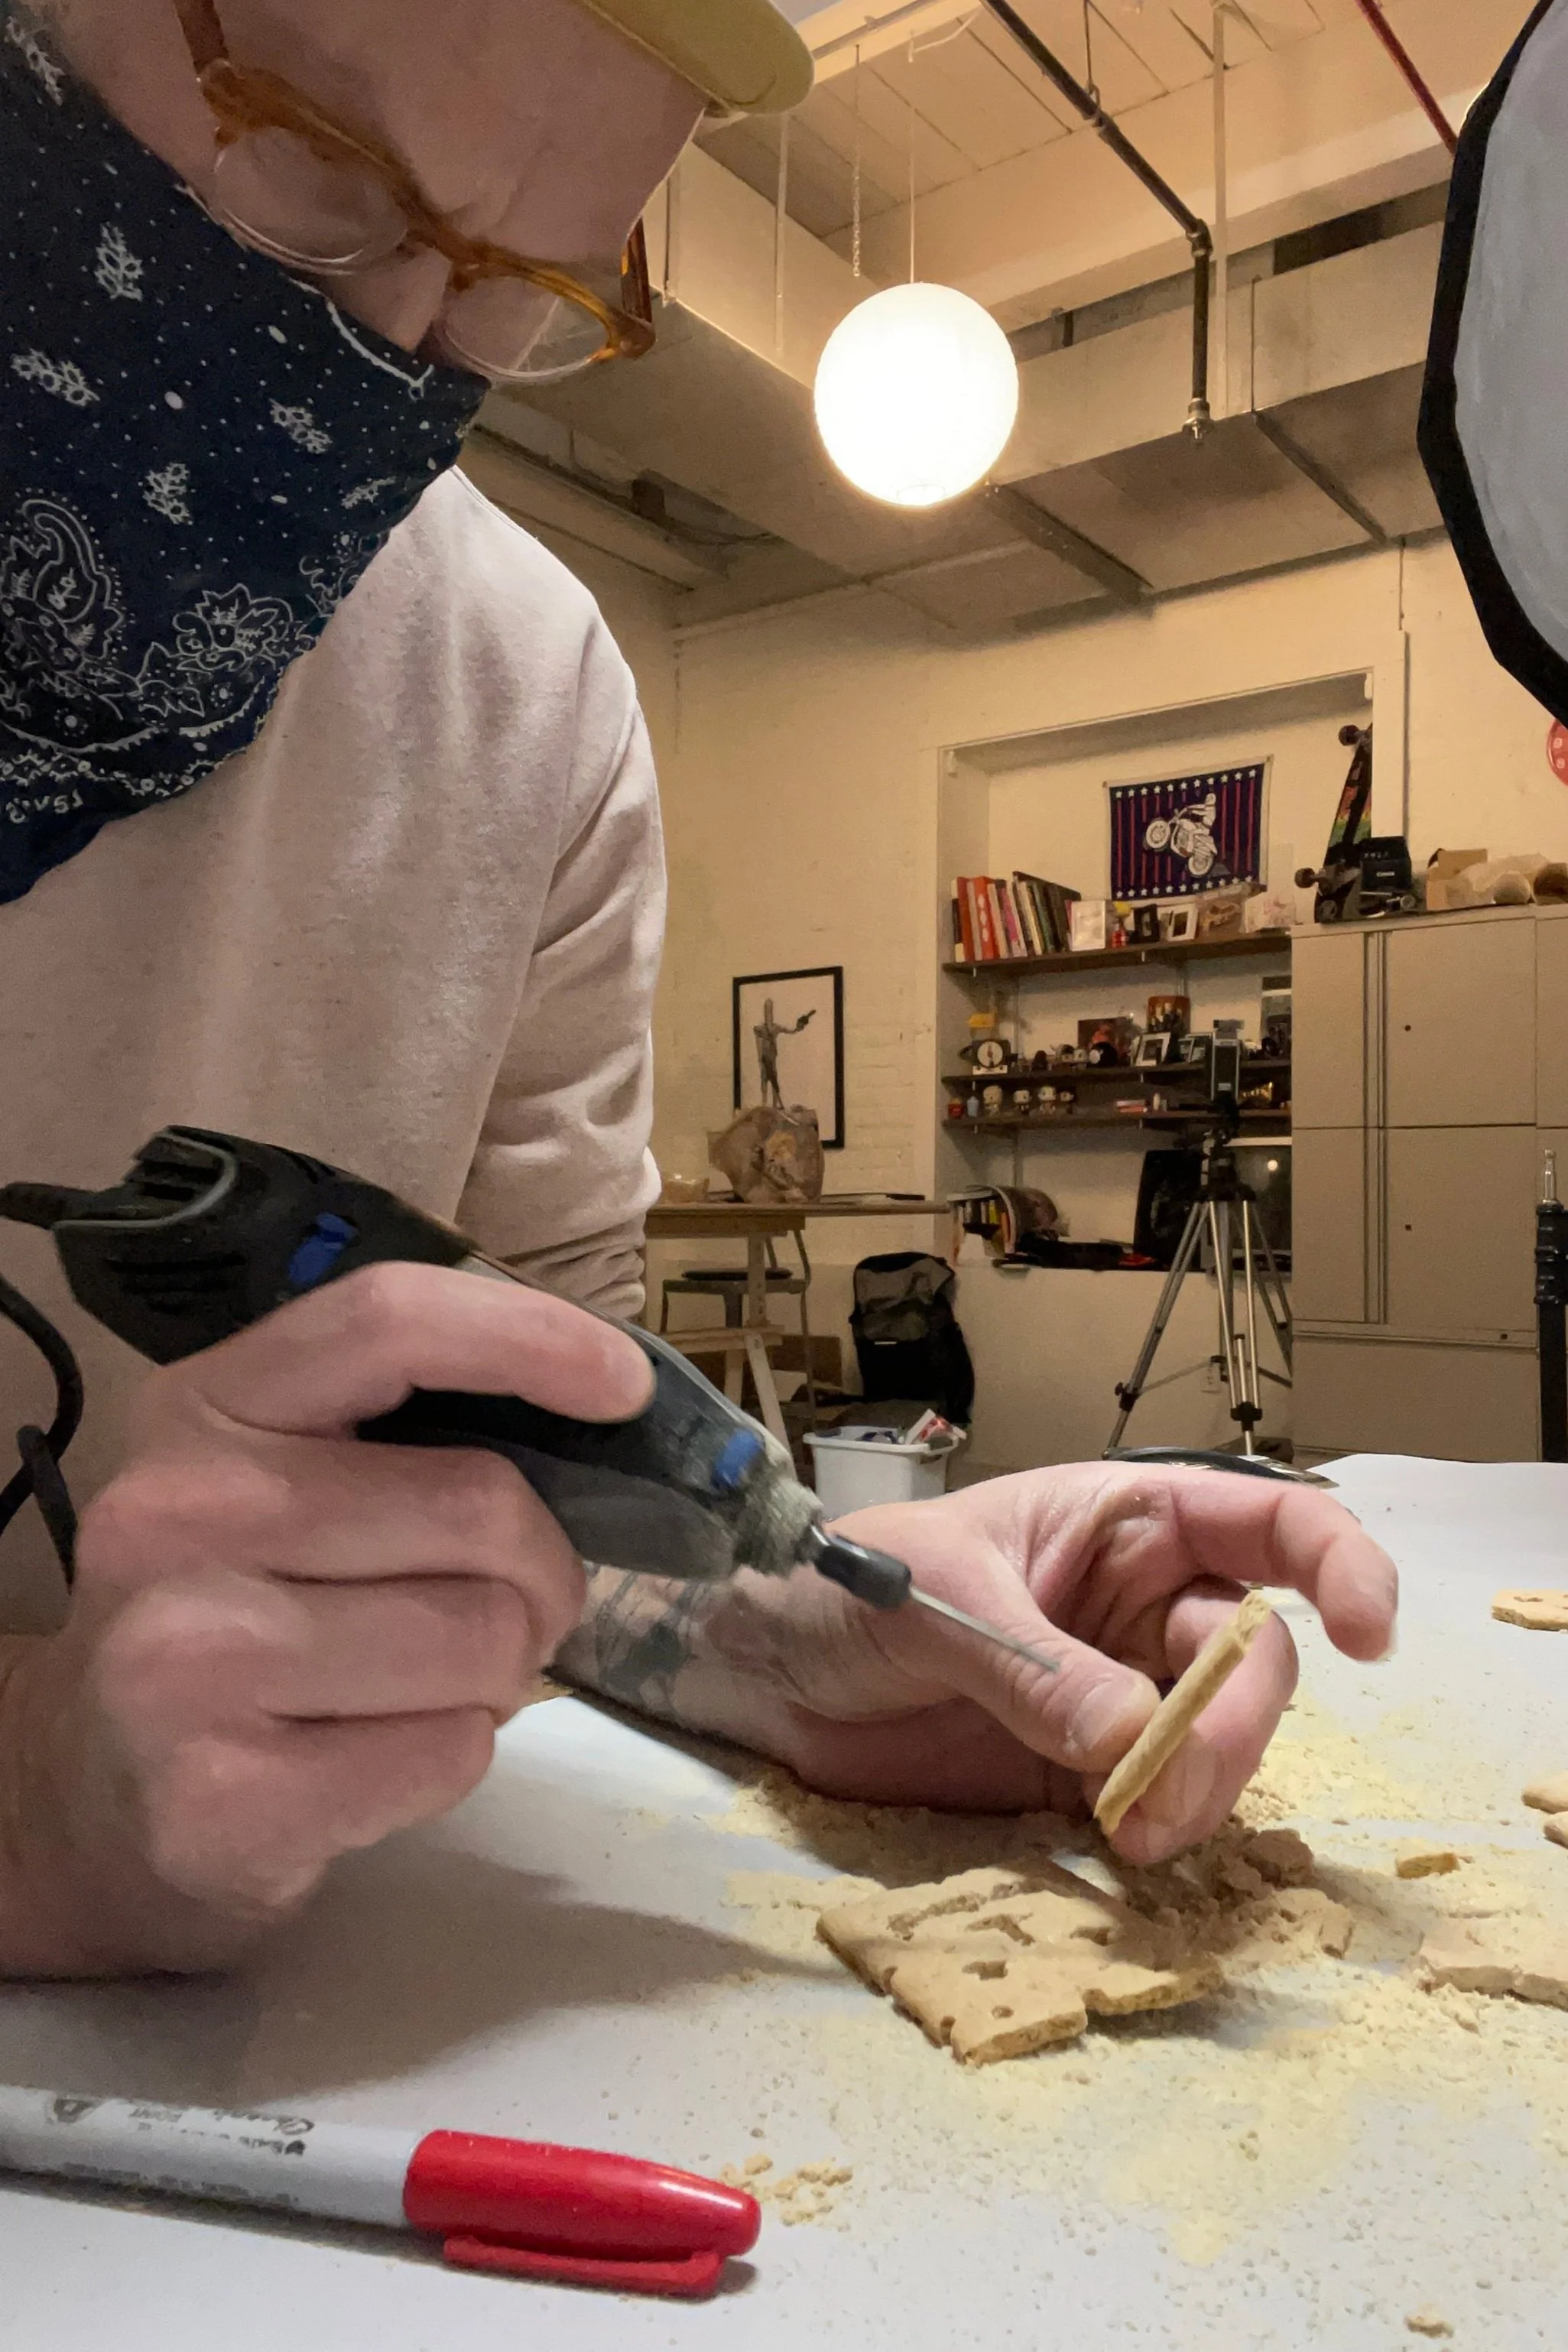
Dremeling Graham Crackers was a first for me and a lot of fun. For the look and feel of the characters and scenes, I took inspiration from the Pacific Northwest and Polynesian culture. (We also just got back from Hawaii.) I used the plastic graham cracker wrapping as the grass skirts. I almost filled the faces in black, but I loved how the light passed through the cutout, giving the cracker characters more life.
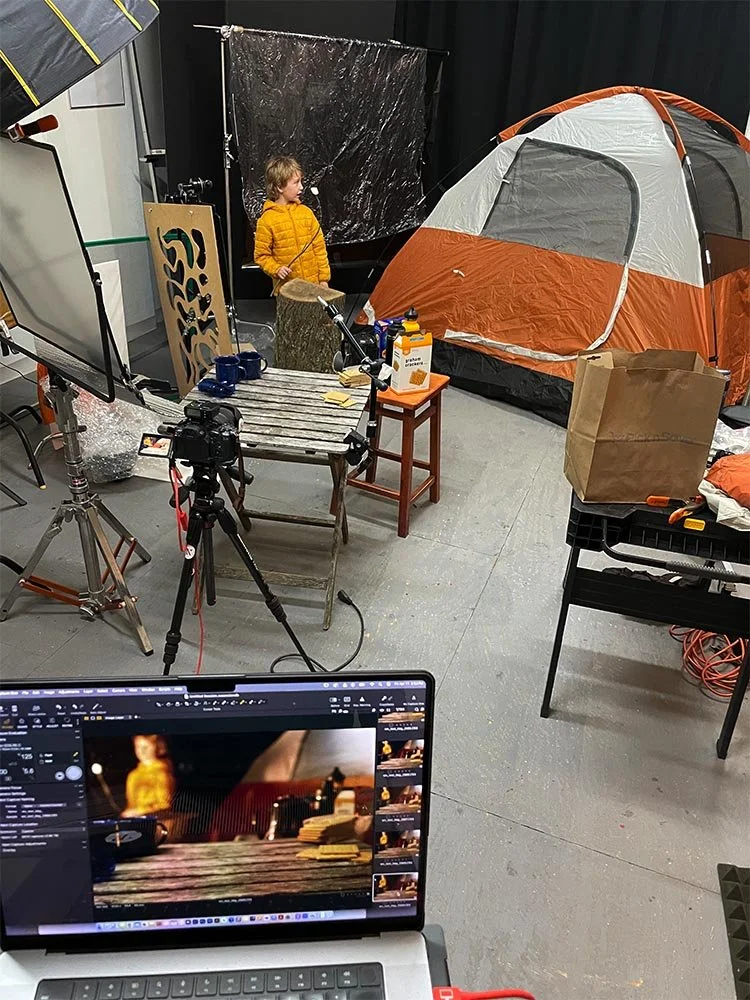
The set was constructed in the studio. My son (in the background) loved having the tent up and an open bag of marshmallows, of course.
While working on this piece, I wanted to challenge myself in post-production to clean the clip out and make the scene fluid from the foreground to the background. I couldn't be more pleased with the outcome and the challenges met. This image always brings a smile to my face.
Thanks for your time.
Breakdown:
Props-
1 graham crackers $2.79
1 6-pack of Hershey's Milk Chocolate $4.97
1 Marshmallows $1.29 (mistake to buy generic)
1 wood matches $1.59
TOTAL= $10.64
Lighting:
1 Broncolor 800L bare bulb with CTO doubled on a floor-stand
1 Broncolor 400L octo gridded overhead.
1 Brocolor 400L in the tent with a 1/2 CTB
1 2’x4’ shinny board
1 sweet homemade cucoloris (IYKYK)
fills and negs
Lens:
I only used my 50mm shot on a tripod.

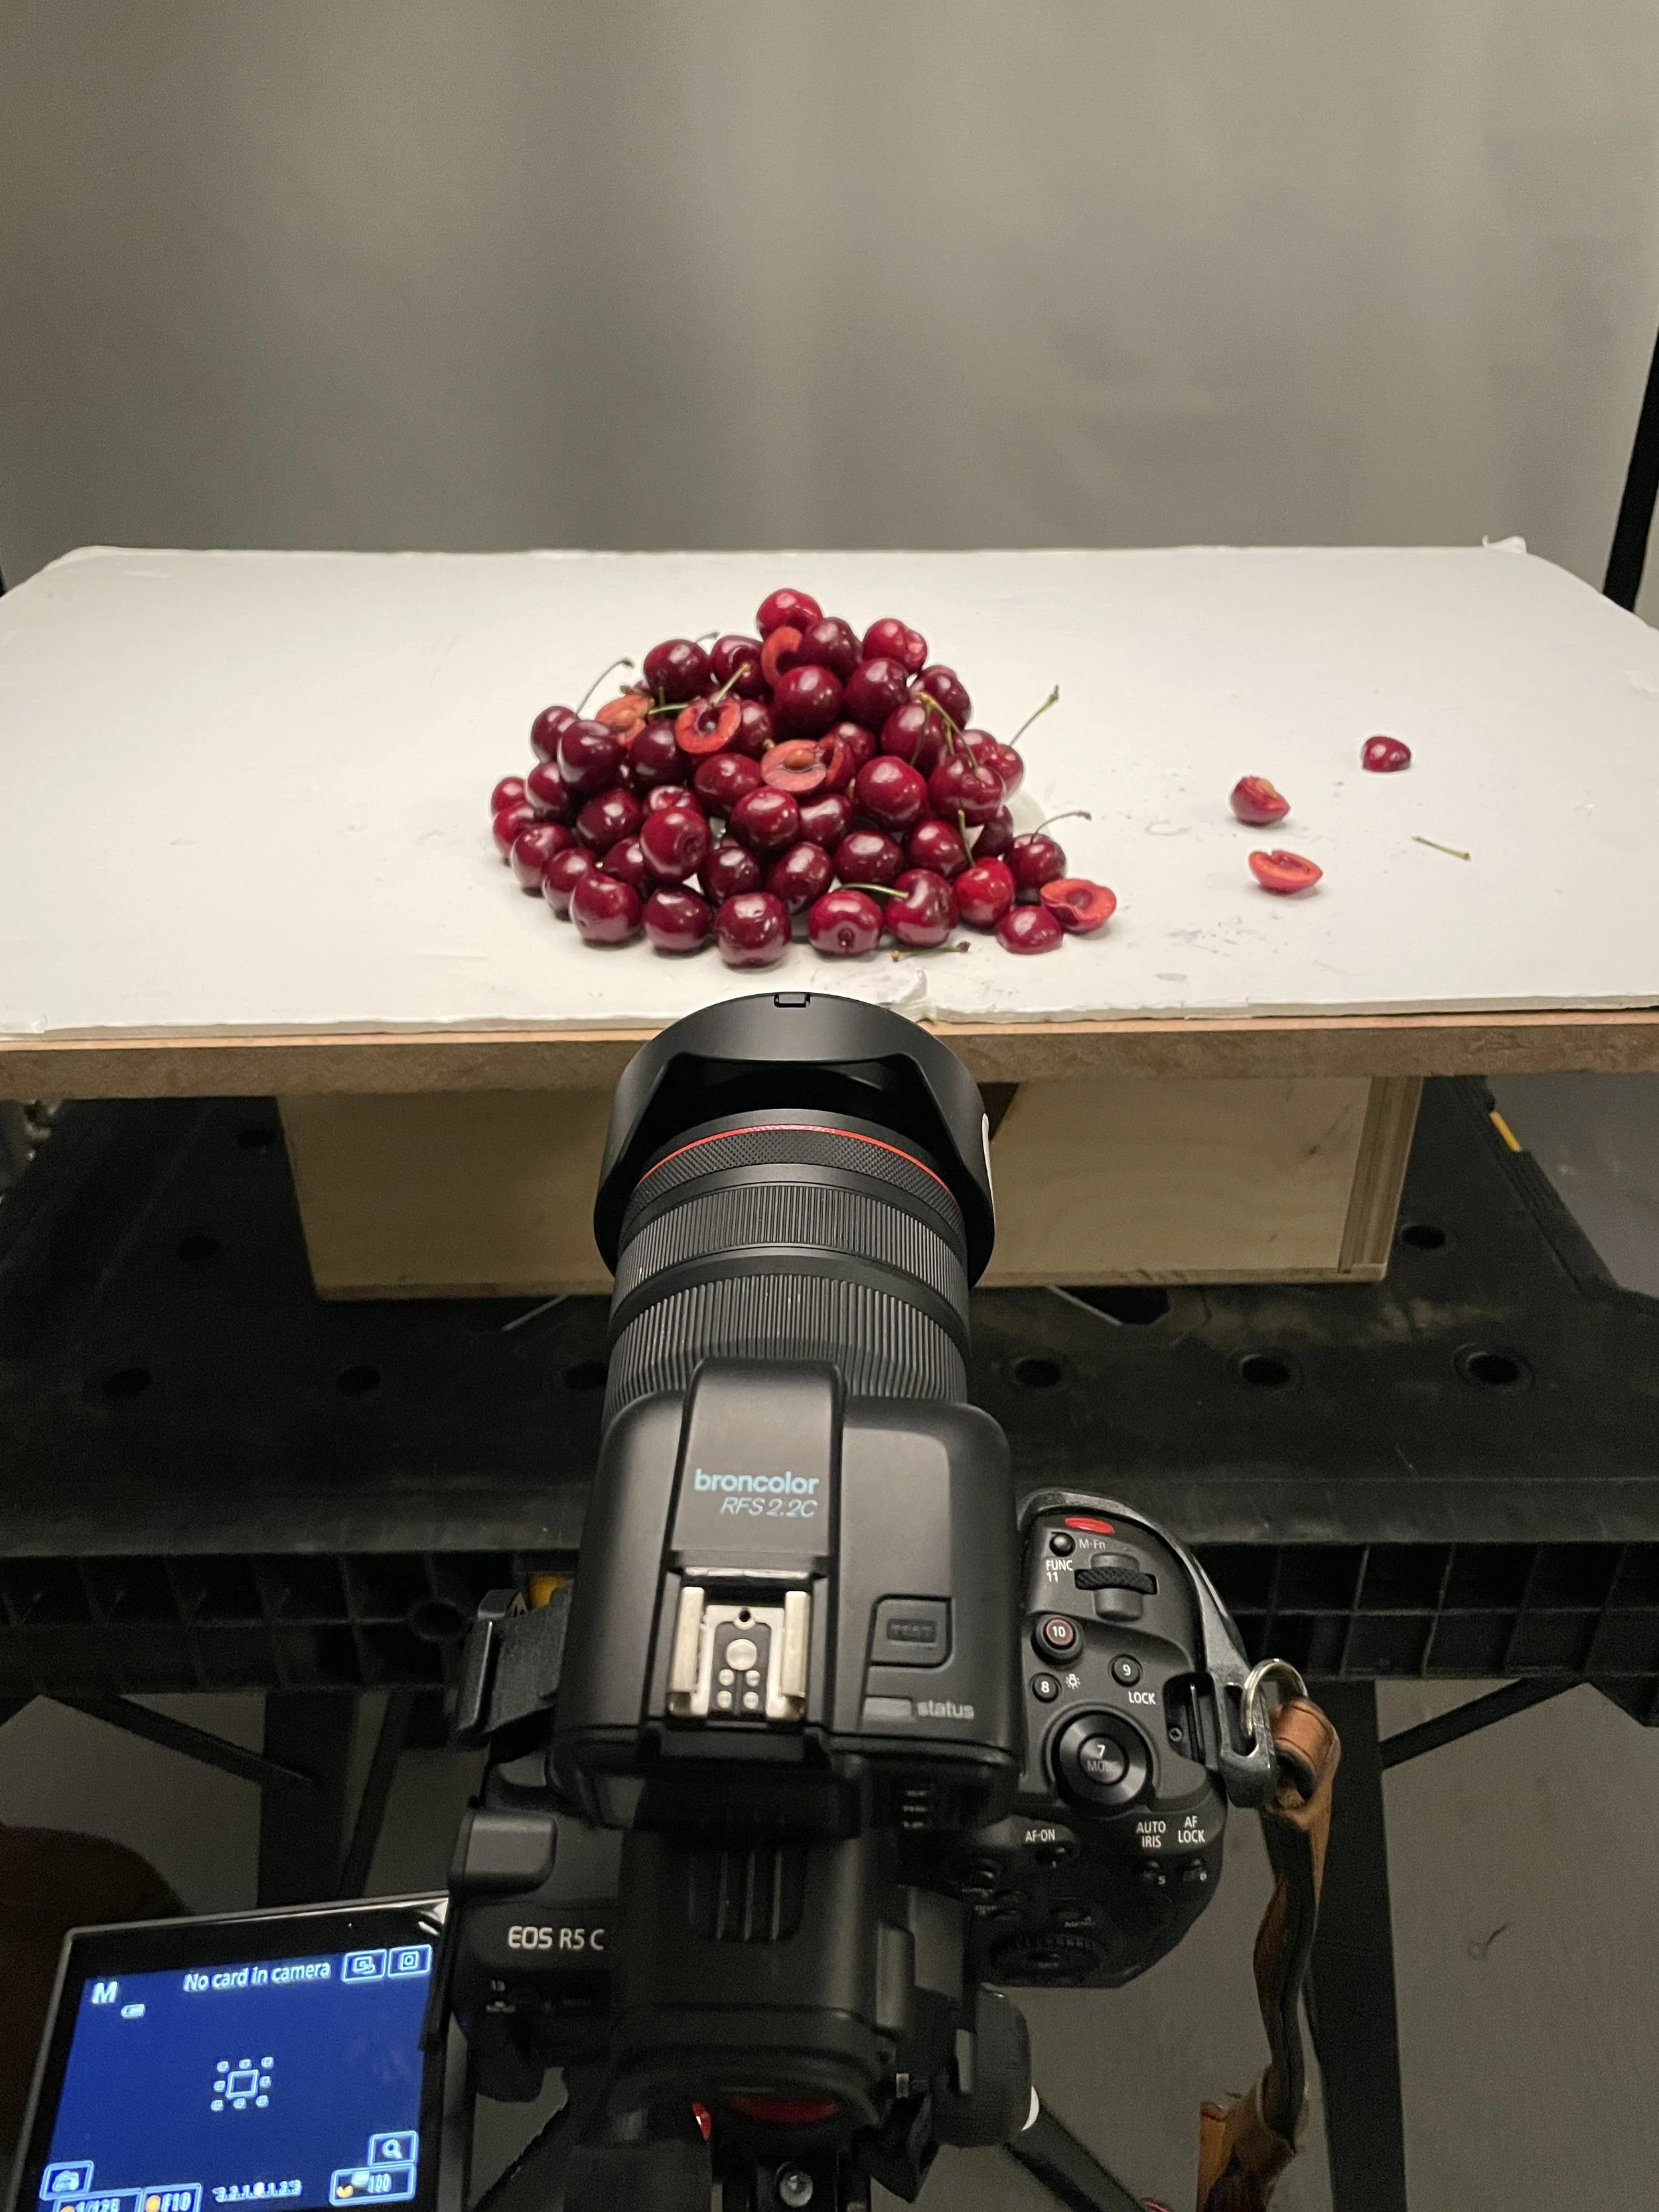
Cherry Pitter
I learned how to pit a cherry using a straw and that cutting up 30 + cherries will stain your fingers.

My first attempt at this project.
This project was really in its infancy at this point. I remember wanting to create a pile of cherries and one on top. The funny thing is that the background stock kitchen image was used because I was auto-signed up for a Photoshop stock photo subscription and was charged a cancellation fee, so I decided to use one if I had to pay for it.
My concentration was really on the top cherry and their expression. At the end, the cocktail sword came to me. Looking back, I should have also given some of the other characters swords. I learned how to pit a cherry using a straw, and that cutting up 30 + cherries will stain your fingers.
He's adorably savage.
Thanks!
Nick
Breakdown:
1 lb of cherries $6.99
1 pack of cocktail swords $5.99
Stock kitchen photo. I don't remember the cost, but I was not happy—I remember that—and didn't want to think about it.
Total = $12.98 plus
Ligthing:
1 Broncolor 800L Large softbox
1 white bounce.